DIY Integrated Supply Module IVM does not start Fix Free
This is not a fix all however, this is a common problem and a Free fix as long as you have the following tools. Please read all instructions below and if you have any questions before tackling this please ask or PM me. I accept no responsibility for damages caused by your actions and I am not a BMW mechanic. I am not a mechanic at all really just a DIY’er that loves to save money any way possible.
If you have any questions please ask.
Tools requires
10 mm Socket
2” extension
Ratchet
5 mm Allen Wrench (it is easier if it has the Multi-Angle head)
Soldering Iron
Solder
Time around 30 minutes.
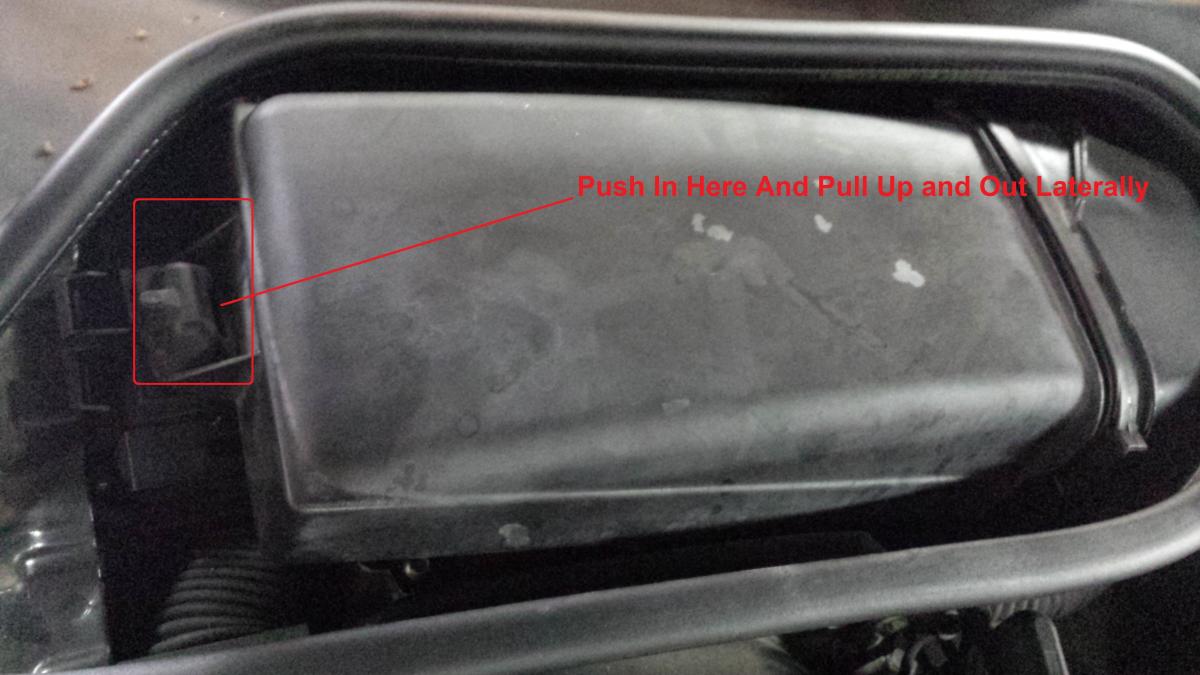
1. First locate the cabin air filter on the passenger side just below the windshield.
2. Remove the cabin air filter by pushing in on the tab and pulling laterally away from the car. (my tab was broken by a previous “mechanic” so please do not break it)
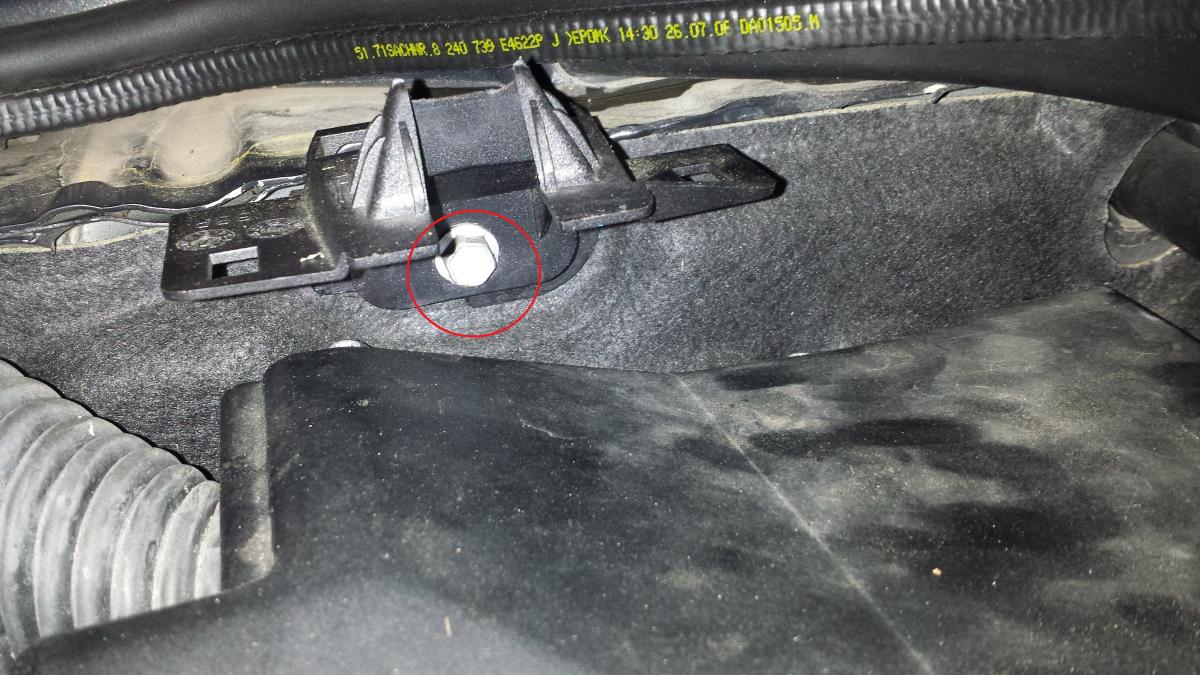
3. Next remove the 10 mm bolt under the clip that you had to push in to remove the cabin filter.
4. Next remove the ~7 bolts that are 5 mm Allen head
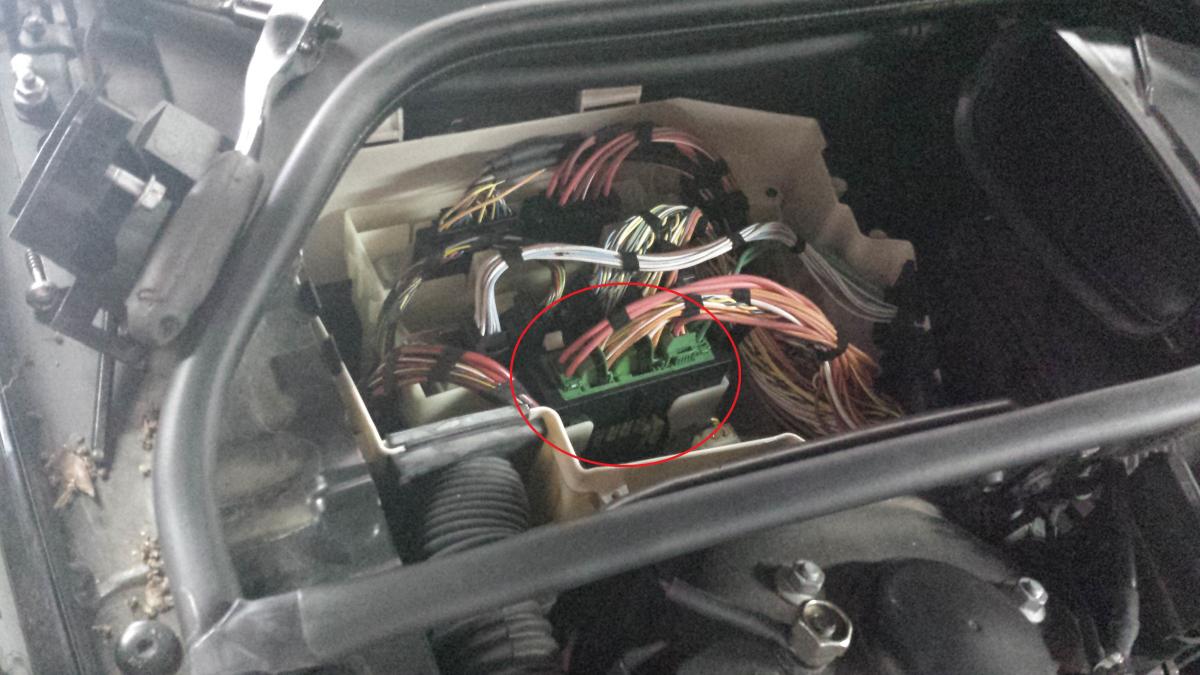
5. Locate the IVM or Integrated Supply Module and remove by pushing in the two white clips and pulling upwards.
6. Remove the 6 wire clips (each one is different just take your time and remove gently
7. Next warm up the soldering iron and move the module to a clean environment.
***Warning DO NOT TOUCH ANY SOLDER POINT OR ANY PART OF THE CIRCUIT BOARD WITH YOUR FINGER AS STATIC ELECTRICITY CAN BE HAZARDOUS TO THE BOARD***
8. Remove the top black covering by placing something flat (butter knives work great) on one side and pull up gently then repeat for the other side.
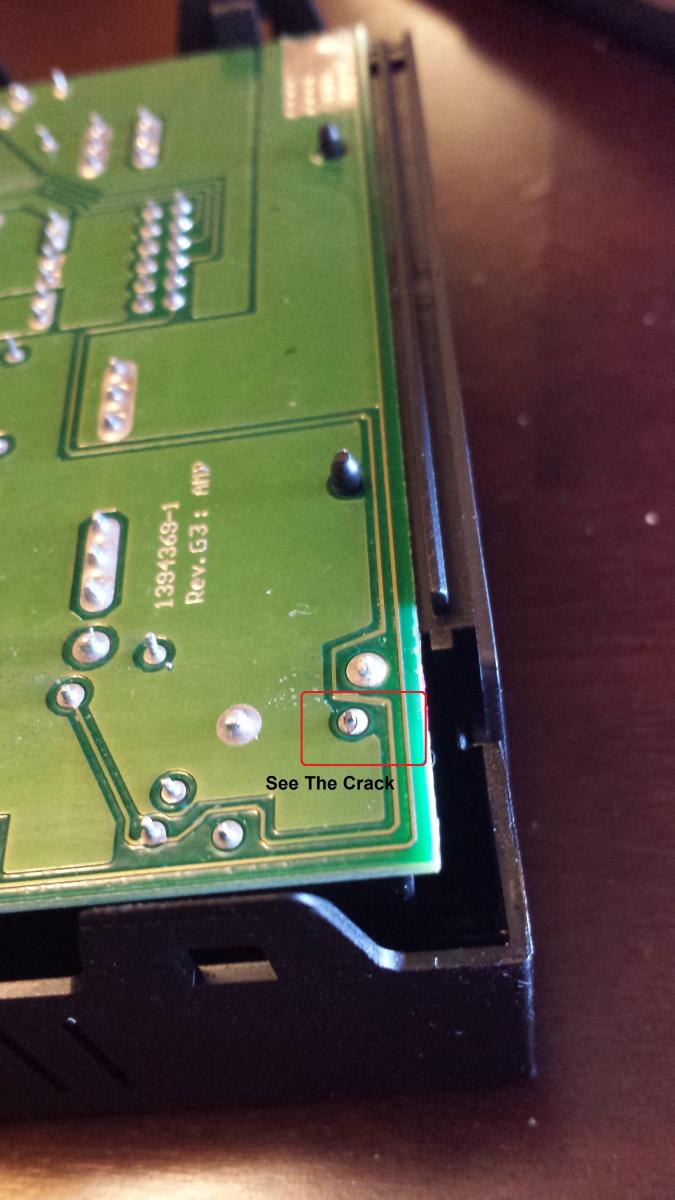
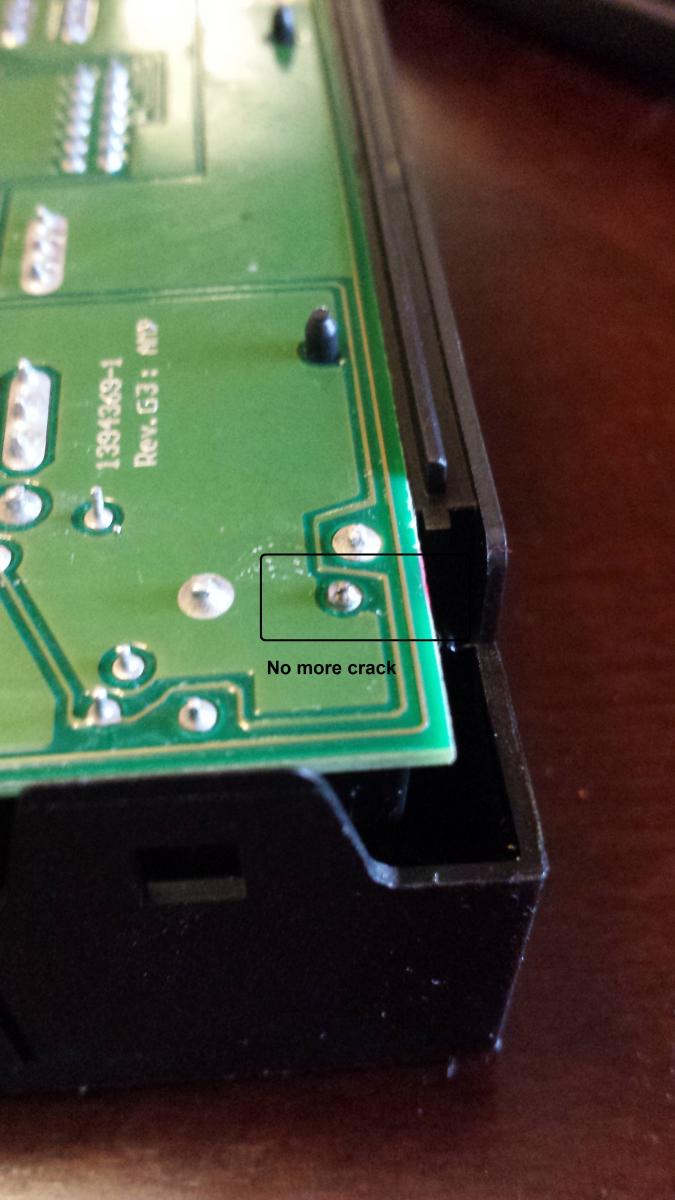
9. Locate the cracked solder point below.
10. Re-Solder the cracked solder point using caution as to not apply too much heat.
11. Allow to cool and replace the black cover and reassemble the car in reverse order
12. Enjoy a free fix that many before you have sent THOUSANDS of dollars.